
Introduction
![]()
In the world of gastronomy, few beverages rival the complex and captivating allure of coffee. Its enchanting aroma, diverse flavor profiles, and the sheer variety of brewing methods have made it an enduring source of fascination for both connoisseurs and casual drinkers alike. Coffee, in many ways, represents a delicate balance between artistry and science, where the precise interplay of variables can yield a cup that transcends the mundane and becomes a sensory masterpiece. In this article, we embark on a journey into the heart of coffee brewing, unraveling the intricate dance between art and science that culminates in a cup of liquid delight.
Among the myriad methods of brewing coffee, one approach has been steadily gaining prominence in recent years—the pour-over method. This method, known for its simplicity and elegance, has evolved into an art form embraced by coffee aficionados and baristas worldwide. The rise of pour-over coffee makers is more than a mere trend; it is a testament to the quest for the perfect cup, where each pour is an act of precision, and every drop is infused with flavor. As we delve deeper into the world of pour-over coffee, we will explore its history, techniques, and the tools that have elevated it to the forefront of modern the coffee industry and culture.
In this article, our aim is twofold. First, we will illuminate the intricate science behind coffee brewing, shedding light on the variables that influence coffee taste,, flavor quality aroma, and texture. From bean selection and grind size to water temperature and extraction time, we will delve into the scientific underpinnings that enable coffee enthusiasts to refine their brewing skills.
Second, we will embark on a captivating journey through the captivating world of pour-over coffee makers. By examining the evolution of this brewing method and demystifying its techniques, we aim to equip readers with the knowledge and inspiration to embark on their own pour-over adventures. Whether you're a seasoned barista seeking to perfect your pour-over craft or a curious coffee lover looking to elevate your morning ritual, this article will serve as your guide to unlocking the intricate art and science of coffee brewing. So, grab your favorite coffee beans, prepare to explore the nuances of the brew, and join us on this aromatic and flavorful expedition.
Understanding Pour-Over Coffee
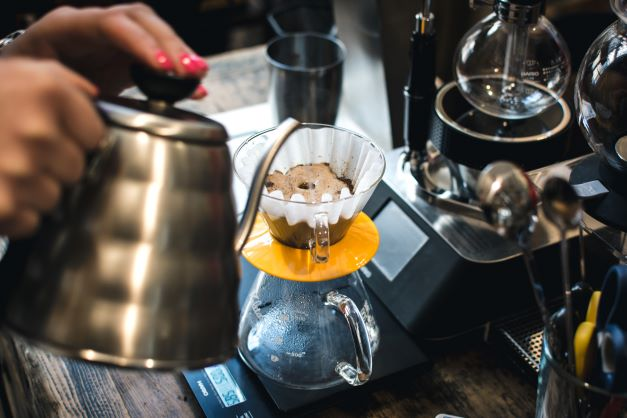
Before we dive into the intricacies of pour-over brewing, let's clarify what exactly this method entails. Pour-over coffee is a manual brewing process where hot water is meticulously poured over freshly ground coffee beans. This slow and controlled extraction method allows for a depth of flavor and aroma that can be hard to achieve with other brewing techniques.
![]()
The process begins with a bed of coffee grounds in a paper or metal filter, typically held in a pour-over dripper or a Chemex vessel. Boiling water is then poured in a circular motion over the coffee grounds, allowing the water to saturate them evenly. As the water interacts with the coffee, it extracts the flavors and oils, resulting in a flavorful and aromatic cup of coffee.
Control and Precision: Pour-over coffee brewing offers unparalleled control over the brewing process. You determine the water temperature, pouring speed, and flow rate, which directly impacts the taste and strength of your coffee. This level of control empowers you to experiment and customize your brew to perfection.
-
Enhanced Flavor Profile: The slow and even extraction process of pour-over coffee extracts a wide range of flavors from the coffee grounds. This method accentuates the unique characteristics of each coffee bean, allowing you to savor subtle notes and complexities that might be hidden in other brewing methods.
-
Aroma and Sensory Experience: As you pour hot water over the coffee grounds, the enticing aroma fills the air, creating an immersive sensory experience. The anticipation of the first sip is almost as enjoyable as the coffee itself.
-
Minimalist Beauty: Pour-over brewing equipment is often praised for its minimalist and elegant design. The ritual of preparing pour-over coffee can be both soothing and visually appealing, making it a delightful addition to your morning routine.
The Role of Equipment in Pour-Over Coffee Making
To embark on your pour-over coffee journey, you'll need the right equipment. While you can start with the basics, there are various options to explore as your interest deepens:
-
Pour-Over Dripper: The heart of pour-over brewing, the dripper holds the filter and coffee grounds while allowing you to control the flow of water. Popular options include the Hario V60, Chemex, and Kalita Wave.
-

-
Coffee Grinder: Freshly ground coffee is key to a fantastic pour-over brew. Invest in a high-quality burr grinder to ensure consistency in your coffee particle size.
-
Kettle: A gooseneck kettle with a precise pouring spout is essential for achieving a controlled and steady water flow.
-
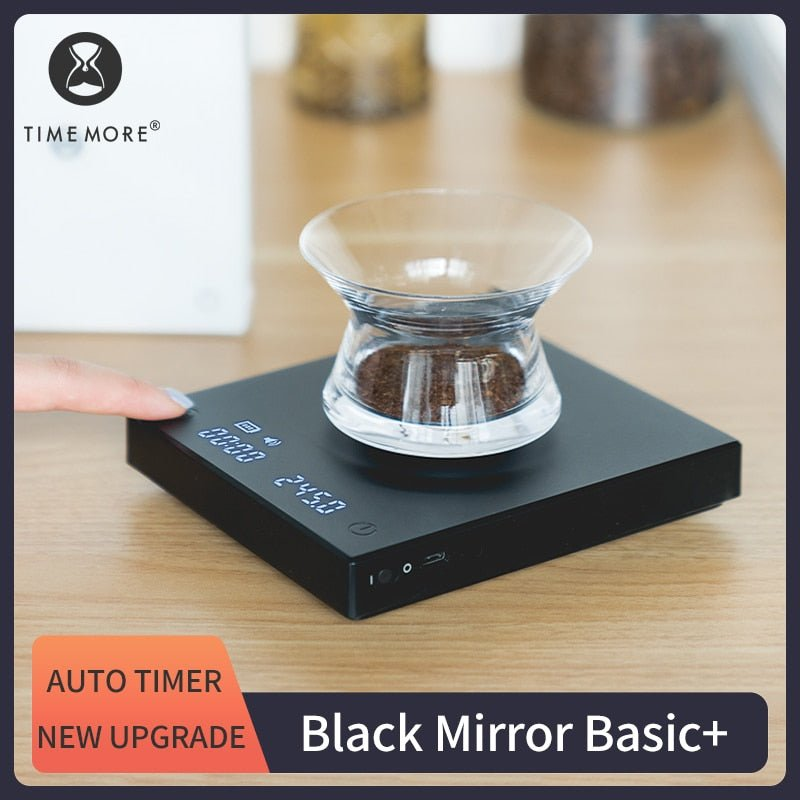
Scale: A kitchen scale helps you measure coffee and water accurately, maintaining the desired coffee-to-water ratio for your brew.
-
Timer: Timing your pour-over process ensures consistency and allows you to fine-tune your technique.
Essential Equipment
There's something magical about starting your day with a perfectly brewed cup of pour-over coffee. The aroma, the ritual, and the rich, nuanced flavors are unparalleled. But to achieve coffee nirvana, you need the right equipment. In this guide, we'll explore the essential tools and accessories that will help you master the art of pour-over coffee brewing, from selecting the finest beans to the intricate components of your pour-over coffee maker.
1. The Heart of the Brew: Coffee Beans

Your journey towards your morning cup of the perfect pour-over begins with selecting the right coffee beans. Quality beans are the foundation of any great cup of coffee. Here's what to look for best tasting coffee in:
-
Freshness: Choose beans that are as freshly roasted as possible. Look for a roast date on the bag, and opt for beans roasted within the past few weeks.
-
Bean Variety: The type of coffee beans you choose will greatly affect the flavor. Common varieties include Arabica and Robusta. Arabica beans are known for their nuanced flavors and mild acidity, while Robusta beans are more robust and slightly bitter. Experiment to find your preference.
-
Single Origin vs. Blend: Single-origin beans come from one specific region and often have unique flavor profiles. Coffee blends combine beans from different regions for a balanced taste. Experiment with both to discover your favorite.

-
Grind Size: Match your grind size to your pour-over method. For pour-over, a medium-fine to medium-coarse grind works best, depending on your preference.
The Pour-Over Coffee Maker Components
Now that you have your beans, let's dive into the essential components of a pour-over drip coffee maker:
-
Dripper: The dripper is where the magic happens. It holds the filter and coffee grounds, allowing hot water to pass through. Common types include V60, Chemex, and Kalita Wave. Each has its unique design and brewing style.
-
Coffee Filter: Choose high-quality, unbleached paper filters or a reusable metal or cloth filter. The filter keeps grounds out of your cup and allows for a smooth extraction.
-
Kettle: A gooseneck kettle with a fine spout provides precise control over water flow. This is crucial for achieving a consistent pour.
-
Scale: A digital scale ensures you use the right coffee-to-water ratio. Consistency is key, and a scale helps you replicate your favorite brew every time.
-
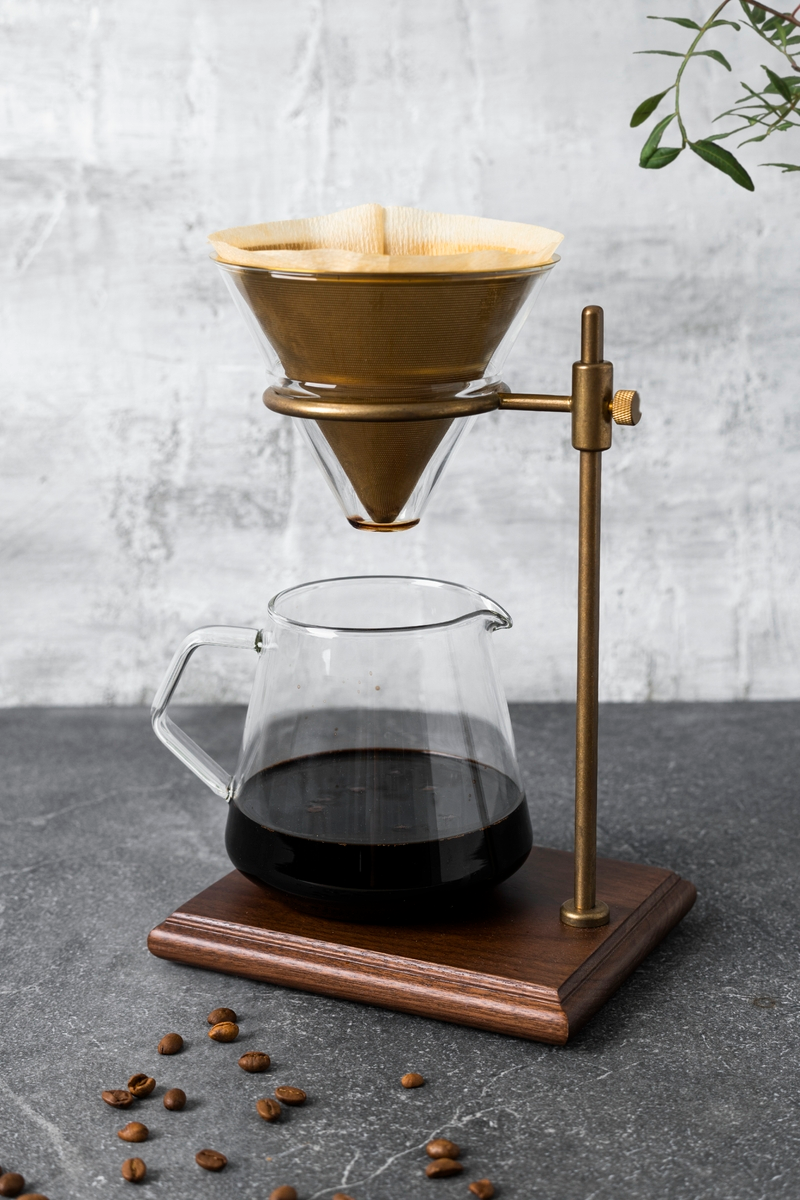
Brew Stand: Some pour-over methods require a brew stand to hold the dripper. It's both functional and aesthetically pleasing.

3. Additional Tools and Accessories
To take your pour-over game to the next level, consider these additional tools and accessories:
-
Burr Grinder: For the freshest coffee, invest in a burr grinder. It allows you to grind your beans just before brewing, preserving their flavors.

-
Timer: Brewing time matters. Use a timer to track your pour time and ensure consistency.
-
Thermometer: Water temperature should be between 195°F and 205°F (90°C to 96°C) for optimal extraction. A thermometer helps you maintain this range.

-
Stirring Stick: A wooden or bamboo stirring stick helps evenly saturate the coffee grounds during the initial bloom phase.
-
Gooseneck Kettle Thermometer: Some kettles come with built-in thermometers, ensuring your water is at the right temperature

Popular Pour-Over Coffee Makers
A. Few coffee brewing methods combine aesthetics, simplicity, and precision quite like the Chemex. With its timeless design and commitment to extracting the purest flavors from your coffee beans, the Chemex has earned its place as a beloved classic in the world of coffee connoisseurs. In this article, we will delve into the Chemex, exploring its features, the brewing process it entails, and the pros and cons of using this iconic coffee maker.
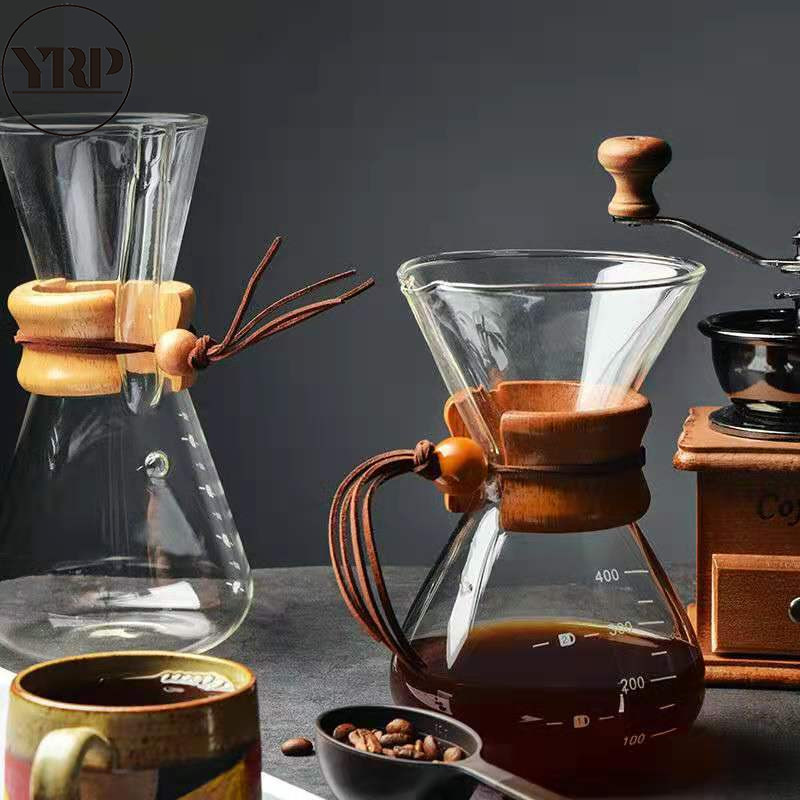
1.1 Elegant Design: The Chemex's design is nothing short of iconic. Invented by Dr. Peter Schlumbohm in 1941, its hourglass shape, wood collar, and leather tie are instantly recognizable. This unique design is not just about aesthetics; it also serves a functional purpose. The hourglass shape allows for uniform brewing, ensuring that the coffee grounds are evenly saturated, resulting in a clean and flavorful cup of coffee.
1.2 High-Quality Materials: Chemex is crafted from high-quality materials, including non-porous Borosilicate glass. This glass is resistant to thermal shock, which means it can withstand extreme temperature changes without cracking. It also won't absorb any odors or chemical residues, ensuring that your coffee tastes as pure as possible.
1.3 Variety of Sizes: The Chemex is available in various sizes, from a compact 3-cup version to larger 10-cup models. This versatility makes it suitable for both solo coffee lovers and those brewing for a group.
Brewing Process:
The Chemex Filter: The heart of the Chemex brewing process is its special filter. These thick, bonded filters are designed to remove even the finest coffee particles and oils, resulting in a clean and crisp cup of coffee. Before brewing, you'll need to fold the filter into a cone shape, ensuring it fits snugly into the top of the Chemex.
Coffee Grounds: For optimal results, use a medium-coarse grind of coffee beans. The Chemex is particularly well-suited for single-origin coffees, as it allows the nuances of the beans to shine through.
The Pour-Over Method: Place the Chemex on a scale to measure your water accurately. The water temperature should be between 195°F to 205°F (90°C to 96°C). Begin by wetting the coffee grounds with a small amount of hot water to allow them to bloom for about 30 seconds. This releases trapped gases and prepares the grounds for full extraction. Then, continue to pour water in a steady, spiral motion pour over coffee brewer, starting from the center and moving outwards. The entire brewing process should take around 3-4 minutes.

Pros and Cons:
Pros:
a. Clean and Pure Flavor: The Chemex's thick filters ensure a sediment-free cup, allowing the true flavors of the coffee to shine.
b. Aesthetic Appeal: Its timeless design makes the Chemex a stylish addition to any kitchen or coffee station.
c. Easy to Clean: The simple design means easy disassembly and cleaning, with no small parts to fuss over.
d. Versatility: Available in various sizes, it accommodates both personal and group coffee needs.
Cons:
a. Manual Brewing: The former Chemex coffee maker requires a more hands-on approach than automatic coffee makers, which might not be suitable for those seeking convenience.
b. Filter Dependence: The special Chemex filters are necessary for the brewing process, and running out of them can be inconvenient.
c. Slow Brewing: The Chemex's pour-over method can take longer than some other brewing methods, which might not be ideal for those in a hurry.
![]()
In conclusion, the Chemex is not just a coffee maker; it's a work of art that consistently delivers a clean, pure, and flavorful cup of coffee. Its elegant design, quality materials, and meticulous brewing process have made it a favorite among coffee enthusiasts. While it requires some manual effort, the results are undoubtedly worth it for those who appreciate the art of coffee brewing. Whether you're a seasoned coffee aficionado or just starting your coffee journey, the Chemex is a brewing method worth exploring. In the world of coffee aficionados, the pour-over is preferred brewing method and is celebrated for its ability to extract nuanced flavors and aromas from coffee beans. Among the various pour-over devices available, the Hario V60 stands out as a popular choice. Its elegant design and reputation for producing exceptional coffee have earned it a dedicated following. In this article, we will explore the Hario V60, focusing on its features, brewing process, and the pros and cons of using this iconic pour-over coffee maker.
The Hario V60: A Precision Pour-Over Coffee Makers
The Hario V60 is renowned for its simplicity and thoughtful design. Here are some of its key features:
a) Cone Shape: The V60 takes its name from its distinctive V-shaped cone design. This very cone shaped shape has a single large opening at the bottom, allowing for precise control of the brewing process.
b) Material Options: Hario offers the V60 in various materials, including ceramic, glass, plastic, and metal. Each material affects the heat retention and durability of the brewer, allowing you to choose the one that suits your preferences.
c) Spiral Ribs: The interior of the V60 features spiral ribs that help create a consistent flow of water through the coffee grounds. This ensures even extraction and a uniform coffee bed.
d) Wide Range of Sizes: The V60 comes in multiple sizes, accommodating different brewing preferences and quantities of coffee. The most common sizes are 01 and 02, with the latter being larger for making multiple cups at once.
e) Filters: Hario provides specialized V60 paper filters that fit perfectly into the brewer. These filters are available in various thicknesses to influence the brew quality, flow rate and extraction process.
Brewing Process with the Hario V60
The brewing process of specialty coffee with the Hario V60 is a delightful and rewarding experience. Here's a step-by-step guide to making great coffee made with this iconic pour-over device:
Ingredients and Equipment:
-
Freshly roasted coffee beans
-
Hario V60 dripper
-
Appropriate V60 filter
-
Gooseneck kettle
-
Coffee grinder
-
Scale and timer
-
Hot water
Steps:
a) Grind your coffee beans to a medium-coarse consistency, similar to sea salt.
b) Place the V60 dripper on top of your coffee cup or server and insert a paper filter.
c) Rinse the filter with hot water to eliminate any paper taste and preheat the V60 and your cup. Discard the filter coffee rinse water.
d) Add your ground coffee to the rinsed filter, leveling it out in the cone.
e) Begin pouring hot water (around 200°F or 93°C) over the coffee grounds in a slow, controlled, and circular motion, starting from the center and moving outward. This is called the "bloom" and allows trapped gases to escape, resulting in even extraction.
f) After 30-45 seconds, continue pouring the hot water in a slow spiral, maintaining a consistent water level and ensuring that all the coffee grounds are saturated.
g) Adjust the brewing time by controlling the pour rate. A typical brew time for the V60 is around 2-3 minutes.
h) Once the coffee has finished dripping through the filter, remove the V60 and enjoy your freshly brewed pour-over coffee.
Pros and Cons of the Hario V60
Pros:
a) Precision Brewing: The V60's cone shape and spiral ribs allow for precise control over brewing variables, resulting in a clean and flavorful cup of coffee.
b) Customization: You can fine-tune your coffee's flavor by adjusting variables such as grind size, water temperature, and pour rate.
c) Elegant Design: The V60's aesthetic appeal and variety of material options make it a stylish addition to any kitchen.
d) Easy to Clean: The V60's simple design makes it easy to clean, and it doesn't require any additional accessories.
Cons:
a) Requires Skill: Achieving consistent results with the V60 can be challenging for beginners, as it demands attention to detail and practice.
b) Single Cup: While larger V60 models are available, the standard size is best suited for brewing a single cup at a time, which may not be ideal for those who need to brew multiple servings simultaneously.
c) Paper Filters: Some users may find that the need for paper filters is an additional expense and generates waste
Features of the Kalita Wave
The Kalita Wave is a pour-over coffee dripper known for its unique design and craftsmanship. Here are some of its standout features:
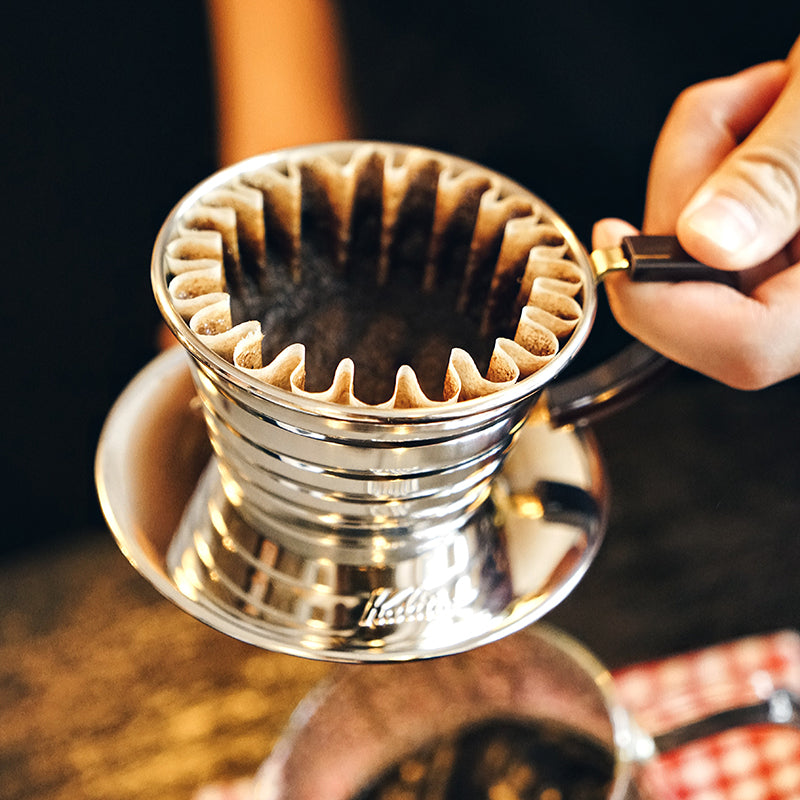
a. Three-Hole Design: The most distinctive feature of the Kalita Wave is its flat-bottomed design with three small, evenly spaced holes. This design promotes even extraction and helps to prevent over-extraction or channeling in the coffee bed.
b. High-Quality Materials: The Kalita Wave is available in various materials, including stainless steel, glass, and ceramic. The choice of material can impact the thermal conductivity and aesthetics of the dripper. The ceramic version, for example, retains heat exceptionally well.
c. Wave Filters: The Kalita Wave uses proprietary wave-shaped filters, which are designed to maintain a consistent flow rate and encourage uniform saturation of the coffee grounds. These proprietary filters also come in different sizes to accommodate various brewing volumes.
d. Flat Bottom: Unlike some other pour-over drippers with conical bottoms, the Kalita Wave has a flat bottom. This results in a more stable bed of coffee grounds during brewing, enhancing the evenness of extraction.
e. Multiple Sizes: The Kalita Wave is available in different sizes, including the 155 and 185 models. The 155 is suitable for single cups, while the 185 is ideal for brewing larger batches.
Brewing Process with the Kalita Wave
Brewing coffee with the Kalita Wave is a straightforward process that requires attention to detail. Here's a step-by-step guide to using this pour-over dripper:
a. Gather Your Equipment:
-
Kalita Wave dripper
-
Kalita Wave filter
-
Freshly ground coffee beans
-
Gooseneck kettle
-
Scale
-
Timer
b. Preheat the Kalita Wave and Rinse the Filter:
-
Place the Kalita Wave on your coffee cup or server.
-
Place a Kalita Wave filter in the dripper and rinse it with hot water. This helps remove any paper residue and preheats the dripper and vessel.
c. Add Coffee Grounds:
-
Measure and add the desired amount of coffee grounds to the filter. The recommended coffee-to-water ratio is typically 1:15 or 1:16, depending on your taste preferences.
d. Start the Brewing Process:
-
Begin pouring hot water (just off the boil) evenly over the coffee grounds, starting from the center and spiraling outwards. This process is known as the "bloom," which allows the coffee to release gases and bloom.
-
After the bloom, continue pouring in a slow, controlled manner, making sure the coffee bed stays evenly saturated. Aim to maintain a consistent flow rate throughout the brewing process.
e. Serve and Enjoy:
-
Once the desired amount of water has been added and the coffee has finished dripping into your cup or server, remove the Kalita Wave and enjoy your freshly brewed coffee.
-
Pros and Cons of the Kalita Wave
Like any coffee brewing method, the Kalita Wave has its advantages and disadvantages:
Pros:
-
Excellent control over brewing variables, such as water flow and temperature.
-
Even extraction, resulting in a balanced and flavorful cup of coffee.
-
Versatility with different coffee beans and grind sizes.
-
Available in various materials and sizes to suit individual preferences.
-
Visually appealing design adds to the overall coffee-making experience.
Cons:
-
Requires a bit of practice to master the pouring technique.
-
Specialized filters may not be as readily available as generic ones.
-
The need for a gooseneck kettle, which can be an additional expense.
-
Slower brewing process compared to some other methods, like a French press/
Aeropress, a brewing method that has taken the coffee world by storm
 We'll explore the fantastic features of the Aeropress, its unique brewing process, and the pros and cons that come with this innovative coffee maker.
1. Features of the Aeropress:
The Aeropress is a compact and portable coffee maker that packs a punch when it comes to brewing quality coffee. Here are some of its standout features:
a. Portability: One of the most significant advantages of the Aeropress is its portability. It's lightweight, durable, and doesn't require electricity, making it the perfect companion for travelers and outdoor enthusiasts.
b. Simplicity: Brewing coffee with the Aeropress is remarkably simple. It consists of just a few components: a cylindrical chamber, a plunger, a filter cap, and paper filters. You won't need a degree in coffee science to operate it effectively.
c. Versatility: The Aeropress is highly versatile, allowing you to experiment with various coffee grounds and brewing times to achieve your preferred flavor profile. It can produce a wide range of coffee styles, from espresso-like shots to American-style coffee.
d. Quick Brew Time: The Aeropress is an espresso machine known for its rapid brewing process. In less than a minute, you can have a piping hot cup of coffee ready to enjoy, making it an excellent choice for those hectic mornings.
2. Brewing Process:

The Aeropress brewing process is a fascinating combination of immersion and pressure. Here's a step-by-step guide to brewing with an Aeropress:
a. Assemble: Place a paper filter inside the filter cap and attach it to the bottom of the Aeropress chamber. Set it on a sturdy cup, bamboo tray or container.
b. Add Coffee: Measure out your coffee grounds and add them to the chamber. The recommended coffee-to-water ratio is about 1:15.
c. Pour Hot Water: Pour just one cup of hot water (around 175-205°F or 80-96°C) into the chamber, saturating the coffee grounds. Give it a quick stir to ensure even saturation.
d. Steep: Allow the coffee to steep for about 10-30 seconds, depending on your coffee mug preferred strength.
e. Press: Attach the plunger to the chamber and gently press down. The pressure will force the brewed coffee through the filter, separating it from the grounds.
f. Enjoy: Dilute your brewed concentrate with hot water if desired, and voilà! You have a fresh cup of coffee brewed and ready to savor.
Pros and Cons:
Pros:
a. Flavor Control: With the Aeropress, you have full control over the brewing parameters, allowing you to fine-tune your coffee's taste to perfection.
b. Speed: It's one of the fastest coffee brewing methods, making it ideal for busy mornings or when you're on the go.
c. Portability: Its compact size and lightweight design make it the ultimate travel companion for coffee lovers.
d. Easy Cleanup: Cleaning the Aeropress is a breeze; simply remove the filter cap, eject the coffee puck and filter, and rinse it off.
Cons:
a. Single Serve: The Aeropress typically brews a single cup of coffee at a time, so it may not be the best choice for large gatherings.
b. Requires Manual Effort: While the process is straightforward, it does require manual effort to press the plunger down, which might not be suitable for those with physical limitations.
c. Limited Volume: The Aeropress has a limited brew capacity, so if you're looking to make multiple cups quickly, you might need to brew multiple times.
Tips for a Perfect Pour-Over
Pour-over coffee drinker or brewing is a popular method for making coffee that allows you to control various factors to achieve the perfect cup. Here are some tips to help you master the art of the best pour over coffee take-over brew:
-
Use Fresh, Quality Coffee Beans: Start with high-quality, freshly roasted coffee beans. Coffee beans lose their flavor over time, so try to use them within a few weeks of roasting.
-
Grind Your Beans Correctly: Grind size is crucial for pour-over coffee. Aim for a medium-coarse grind, similar to kosher salt. Adjust the grind size to match your brewing time and equipment (e.g., finer for shorter brew times, coarser for longer brew times).

-
Use Clean, Filtered Water: The water you use can significantly affect the taste of your coffee. Use clean, filtered water that's free from impurities. Ideally, the water temperature should be between 195°F to 205°F (90°C to 96°C).

-
Choose the Right Pour-Over Equipment: Invest in a good pour-over cone or dripper, such as a Hario V60, Chemex, Kalita Wave, or Aeropress. Each one has its unique characteristics, so choose the one that suits your taste preferences.
-
Preheat Your Equipment: Preheat your pour-over cone and coffee vessel by rinsing them with hot water. This helps maintain a stable brewing temperature.
-
Measure Your Coffee and Water: Use a scale to measure both your coffee grounds and water accurately. A general ratio to start with is 1:15 (1 gram of coffee to 15 grams of water), but you can adjust this to taste.
-
Bloom the Coffee: After adding coffee grounds to the filter, pour a small amount of hot water (about twice the weight of the coffee) evenly over the grounds to saturate them. Allow the coffee to bloom for about 30 seconds. This releases trapped gases and primes the grounds for extraction.
-
Control Your Pour: Pour water in a slow, steady, and circular motion, starting from the center and moving outward. Maintain a consistent pour rate to keep the water level steady.
-
Maintain the Brew Time: Pay attention to the brew time. Adjust the grind size, pour rate, or coffee-to-water ratio to achieve your desired brew time, typically between 2.5 to 4 minutes.
-
Practice Patience: Be patient and allow the water to drip through the coffee grounds naturally. Rushing the process can result in over-extraction or bitterness.

-
Experiment and Fine-Tune: Tastes vary, so don't be afraid to experiment with different coffee beans, grind sizes, water temperatures, and brewing times until you find your perfect cup.
-
Enjoy Promptly: Pour-over coffee is best enjoyed fresh. Serve it immediately after brewing to savor its full flavor profile.
Remember that perfecting pour-over coffee can take some practice, but the effort is well worth it for those who appreciate a finely crafted cup of coffee. Keep refining your pour overs over technique and making adjustments until you find the one brews great coffee that suits your taste preferences
0 comments